Why should you sign an Inspection Agreement?

Most home inspectors ask each client to sign an Inspection Agreement before performing a home inspection. Why?

An Inspection Agreement protects both the Client (homebuyer) and the Inspector. It sets expectations for what will (and will not be) inspected, and it specifies other terms that both parties agree to. The following are some of the things that may be included in an Inspection Agreement:

Fee: The Inspection Agreement specifies what fee will be paid by the Client to the Inspector for the home inspection.

Scope of Work: The Inspection Agreement spells out what the home inspector will and will not do. Most home inspectors follow a set Standards of Practice. Here in Texas, inspectors are required to follow the Standards of Practice defined by the Texas Real Estate Commission. In other states, Inspectors may follow the requirements of a particular state, of the International Association of Certified Home Inspectors®, or of another creditable trade association. The Inspection Agreement should state specifically which Standards of Practice the Inspector will follow.

Dispute Resolution: The Inspection Agreement describes the steps that will be taken to resolve any disputes. Disputes between clients and inspectors are not common, but they do happen. A large majority of disputes are resolved through open, informal conversation between the parties. In rare cases, legal action is taken, and the process must follow the steps set out in the Inspection Agreement. Depending on the Agreement, this may involve arbitration or mediation.

Statute of Limitations: The Inspection Agreement describes the applicable statute of limitations for disputes. Homes require maintenance, and things change over time. It is not realistic for a homebuyer to discover a defect several years later and try to claim that the home inspector missed something during the inspection. Typically, a statute of limitations is specified as one or two years.

Limitation of Liability: The Inspection Agreement may include a Limitation of Liability clause. This clause limits the amount that the Inspector would pay back to the client in case of a dispute that is not resolved informally. Many Inspection Agreements limit this to the amount of the fee paid to the Inspector. Why is this?

A home is a significant investment. Most of the homes I inspect have selling prices in the range of $300,000 – $800,000, but the fees I charge for most inspections are approximately $300 –  $500. If I was potentially at risk for the full cost of the home, I would have to charge a lot more for each inspection.

Signature: Finally, the Inspection Agreement includes signatures and dates by both parties. This shows that everyone involved has read the terms of the Agreement and will comply with those terms.

These are a few of the common clauses in a home inspector’s Inspection Agreement. Feel free to ask for a sample Agreement from an inspector, they should be happy to provide that. Click here to view and download the Inspection Agreement I use on the Resources page.

Typically a home inspector requests that the Client read and sign the Inspection Agreement before the inspection is performed in order to minimize misunderstandings and surprises. I have a convenient online system – once the inspection is booked, the Client receives an email with a link to read and sign the Inspection Agreement online, and to make payment.

Do you have any questions about Inspection Agreements, home inspections, or homes in general? Call or text me anytime at 832-986-1942, or email me at inspector@mileposthome.com. – Tim Howell, Milepost Home Inspection. TX Professional Inspector License 24309.


How old is your furnace?

Knowing the age of your furnace, air conditioner, and appliance can be helpful when you consider maintenance and repairs. If an item is near, at, or past its expected useful lifespan, you may want to plan for replacement instead of repair. But how do you know how old it is?

If you had the item installed, hopefully you have the original receipt and invoice. Did you register it on the manufacturer’s website? If so, you may be able to access the records there. You can also often determine the item’s date of manufacture from the dataplate. The dataplate is the information sticker showing the item’s model and serial number. Sometimes, but not always, the dataplate will show the actual date of manufacture. If that date is not clearly shown, you may be able to determine the age using the model and serial numbers.

Here’s an example using a furnace …

  1. Find the dataplate on the item. On a furnace, it may be either on the outside of the unit, or you may need to remove the maintenance panel to see it (if you don’t feel comfortable doing that, ask your technician to record the information and take a picture of the dataplate at your next maintenance appointment).
  2. Record the manufacturer, along with the model and serial numbers. It’s good to record these, along with a photo of the dataplate, for insurance purposes.
  3. Go to https://www.building-center.org.
  4. Click “HVAC INDEX” for Heating, Ventilation, and Air Conditioning items. There is a separate button for Water Heaters.
  5. Scroll down the list and select the correct manufacturer.
  6. Look through the options to find a serial number that matches the format of yours.

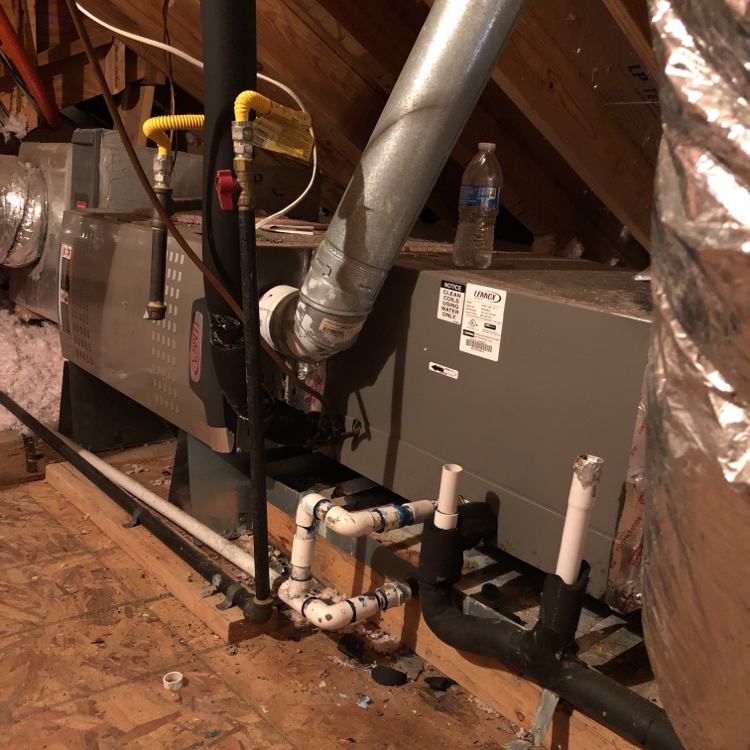
Furnace dataplate

Building-center.org
Equipment age

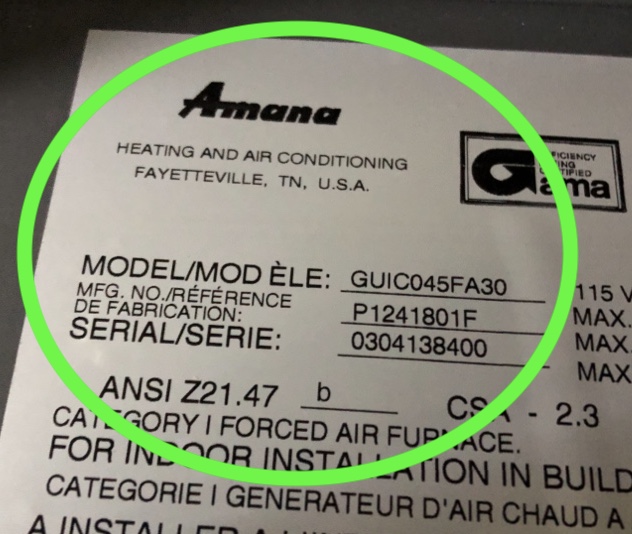
In this example, the manufacturer is Amana, the Model Number is GUIC045FA30, and the Serial Number is 0304138400. The Building Center website shows this is Style 1, with the first two digits indicating the year of manufacture and the second two digits indicating the month. So this particular furnace was manufactured in April (04) of 2003. 

Building Center website works well for HVAC and Water Heater units. It does not cover other items such as kitchen appliances. For those, use Appliance411; the format is a little different but it generally works the same.

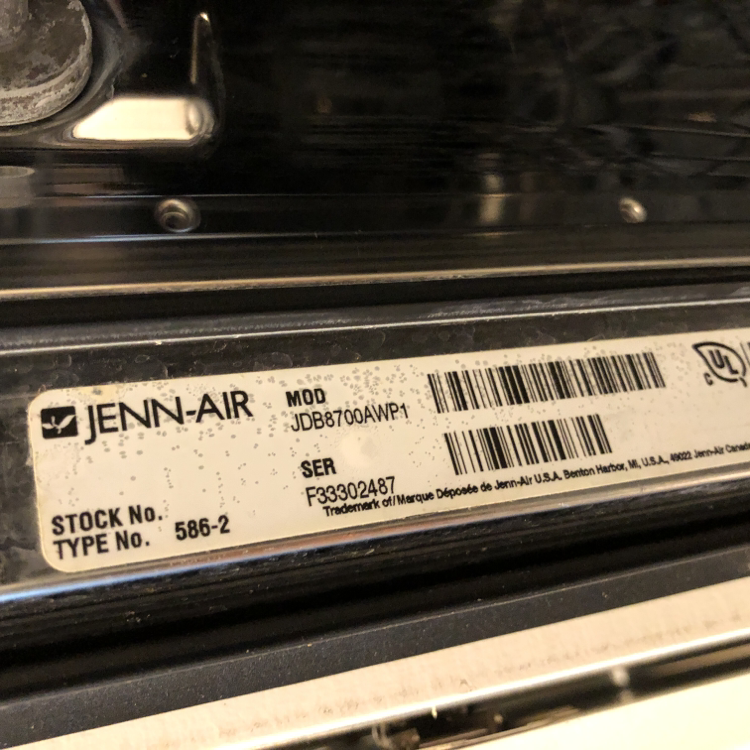
It can be a little tricky to find the dataplates at times. On a water heater it’s usually easily visible on the side of the unit. On an outside condensing unit (air conditioner), it’s usually on a side or corner of the unit (hopefully it hasn’t faded due to weather). On kitchen appliances, it’s often visible when the door is open, on the edge of the door or the unit.

Dishwasher dataplate

It can be a little tricky to find the dataplates at times. On a water heater it’s usually easily visible on the side of the unit. On an outside condensing unit (air conditioner), it’s usually on a side or corner of the unit (hopefully it hasn’t faded due to weather). On kitchen appliances, it’s often visible when the door is open, on the edge of the door or the unit.

For information about possible recalls on equipment and appliances, read about RecallChek here . For approximate lifespans of items in your home, go to the Resources page and scroll down to the Life Expectancy Chart.

As always, please feel free contact Tim Howell at Milepost Home Inspection with any questions about your house. Call/text 832-986-1942, email inspector@mileposthome.com, or use the Contact page.

Save Money? Yes, Please! Here’s How …

Want to save money? Everyone does, right? One way to do that is to increase your home’s energy efficiency, reducing your monthly bills for water, electricity, and natural gas.

Evaluation of a home’s energy efficiency of a home is outside the scope of a typical home inspection. However, a home inspector does look for deficiencies that can reduce a home’s energy efficiency. These deficiencies include such things as inadequate attic insulation, damaged or missing sealant around windows and doors, dirty air filters, and non-performing heating and cooling equipment.

Nearly every home has opportunities for increased energy efficiency. Reducing energy usage can save you money by lowering  your utility bills; in addition, it reduces the demand for energy sources and can increase the level of comfort in your home.

The energy use of a home can be reduced in many ways. Some of these changes are relatively easy and inexpensive, others are more complex. Some options include the following: adding insulation, sealing around windows and doors, replacing old windows, installing more efficient appliances, installing programmable thermostats, sealing and insulating air ducts.

The U.S. Department of Energy has free tools that offer advice and information about reducing energy usage in your home. A downloadable Energy Saver Guide is available here.

The online Home Energy Saver is a free tool that allows the homeowner to input details about their home and receive advice and cost benefit information about various energy-reducing strategies. The Home Energy Saver tool is available here.

It doesn’t have to take a lot of time, effort, or cost to make a few changes that reduce your home’s energy usage. Take a look around your home, what can you do to save energy and reduce your monthly utility bills?


Almost 5,000sf? How do I inspect that?

I recently had the opportunity to inspect a home listed at over 4,900 square feet. I am a single inspector, I do not have a team to help me out. How did I handle all that?

I made a clear plan of attack, communicated it with the client, then followed it through. That home was almost double the size of many of my inspections, so I decided to take two days to cover it all. I wrote out a plan and brought that with me to the inspection.

My plan started with the more difficult, more complex systems and areas first. It looked like this:

Day 1: start at 9am, aim to stop about 3pm. Inspect in this order:
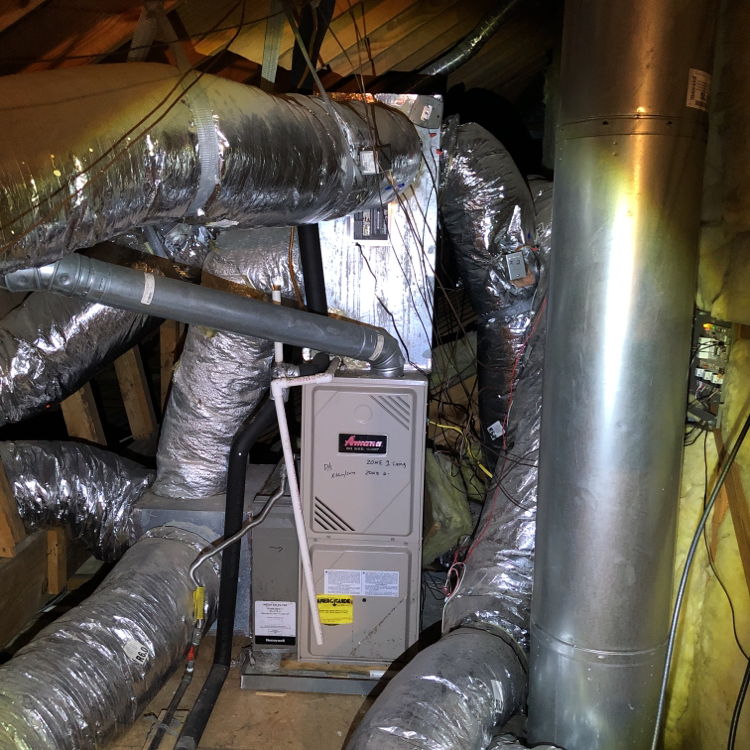
1. Attics (including furnaces and water heaters)
2. Condensing units
3. Electrical panels
4. Run air conditioning and heat while continuing with inspection
5. Kitchen
6. Other first floor rooms
7. Second floor rooms
8. Garage

Day 2: start at 9am, aim to stop about noon. Inspect in this order:
1. Roof
2. Exterior – walls, grading
3. Pavilion
4. Fence and pool barrier
5. Lawn sprinkler
6. Anything else

Each day took me 30-45 minutes longer than planned (partly due to a very chatty resident); overall it worked out about how I expected. On the evening of Day 1, I was able to clean up some things in the report from that day’s work. On Day 2, I did a final review of the report in the afternoon. It was then completed and delivered to the client before 5:00pm.

With this plan, I was able to break down the large job into manageable parts. It also helped me to not feel rushed, especially as I got to the afternoon of Day 1. I knew that everything was under control and that I would have the time I needed for a thorough inspection.

What questions do you have about your home? Contact me anytime, I’ll be happy to talk with you. Tim Howell, Milepost Home Inspection, 832-986-1942, inspector@mileposthome.com. Texas Professional Inspector License #24309.

Are you ready for storms?

The Houston storm season is approaching rapidly. Are you and your home ready for heavy rains?

Take a look at your landscaping. Is there mulch or soil piled up against the brick, above the floor line? This can cause water to move through the wall into your house. Do you have landscaping blocks or edging that can block water drainage? This can water to collect against the house, causing unwanted foundation movement and damage.

Planting bed against home.

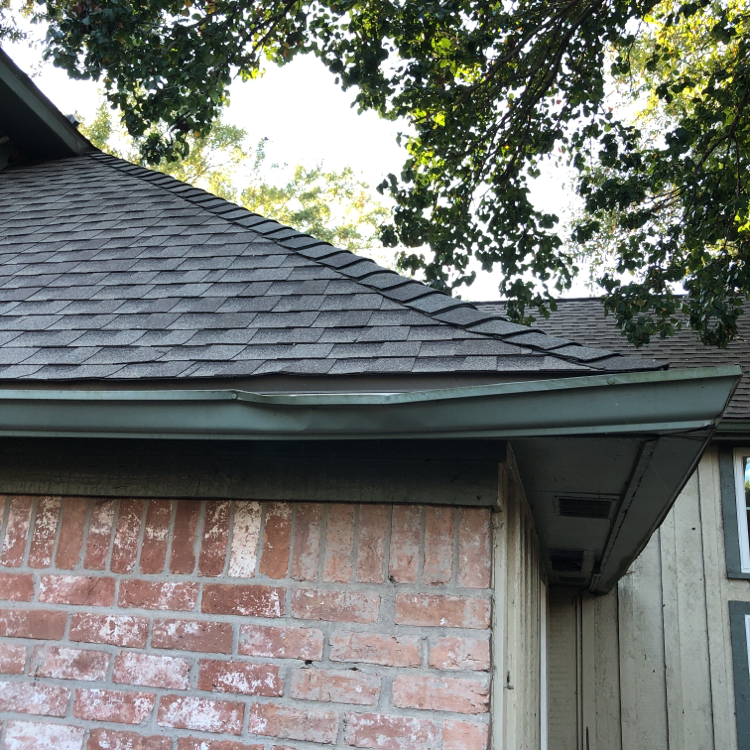
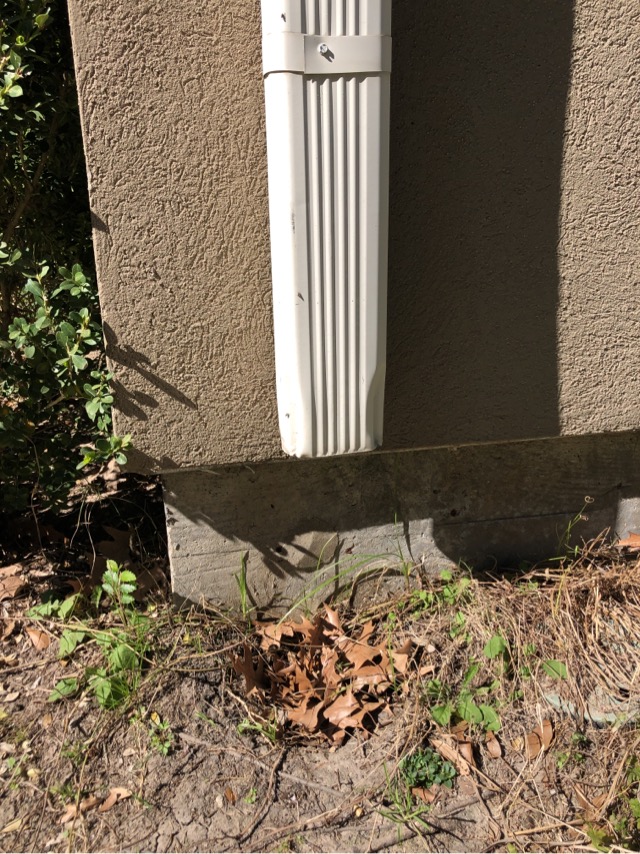
What condition are your gutters and downspouts in? These are intended to carry water from your roof away from the house. If they are damaged or sloped incorrectly, they may collect water – potentially causing damage to the home’s structure, finishes, and foundation.

Damaged gutter.

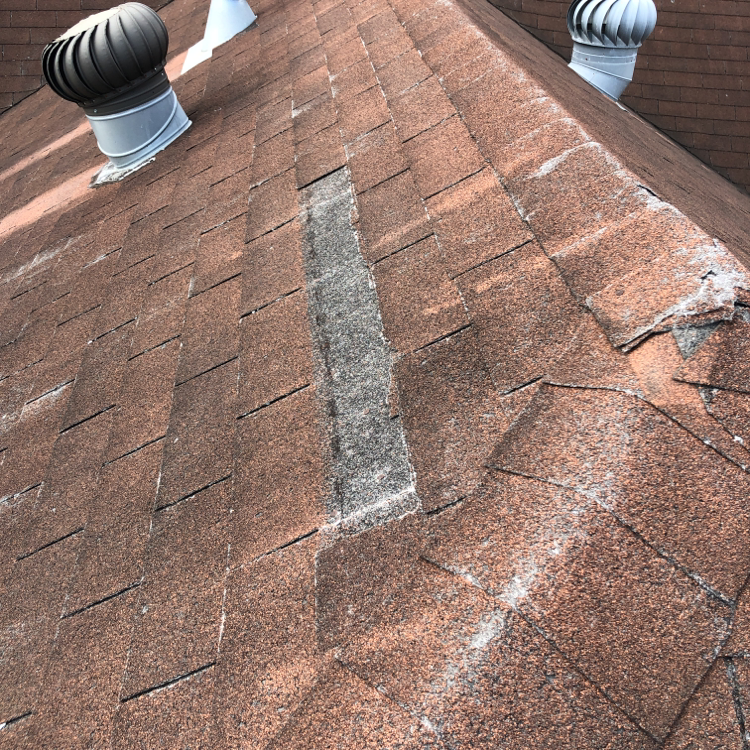
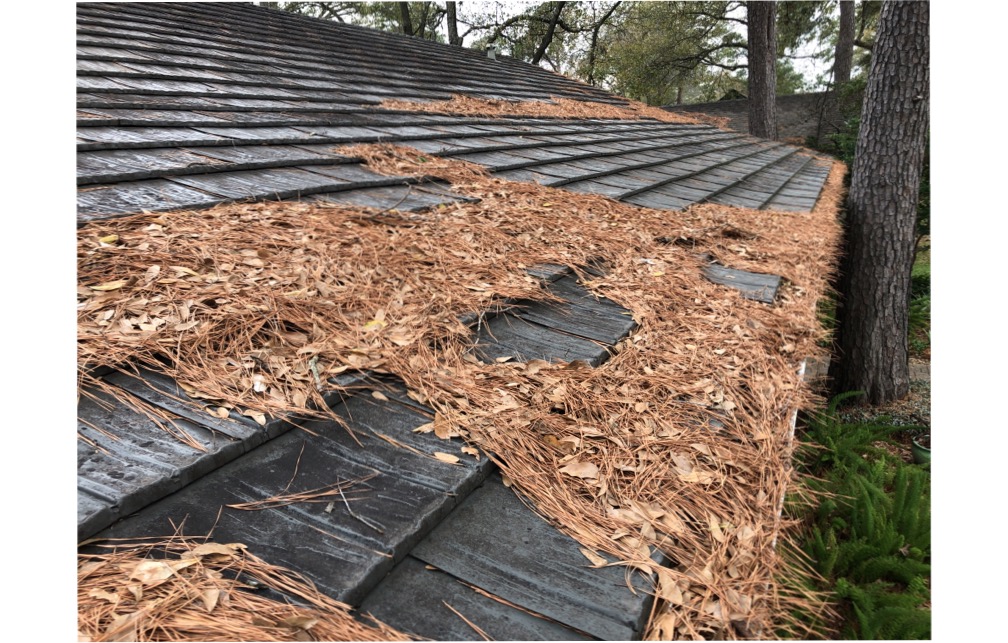
What condition is your roof? Loose, damaged, or worn shingles can lead to roof leaks, causing damage to the roof structure and the interior finishes and possessions.

Damaged shingles.

Do you have flood insurance? Everyone in the Houston area should carry flood insurance, regardless of flood zone designation. Strong storms can cause localized flooding anywhere. Generally, flood insurance also covers damage caused by any water that comes from off your property – such as a neighbor’s sprinkler system malfunctioning, causing water to run into your home. Be aware that flood insurance typically has a 30-day waiting period before becoming effective.

Several agencies provide more information about flood insurance and emergency preparedness. Learn more at houstonoem.org, readyharris.org, texasready.gov, and floodsmart.gov.

For questions about flood insurance, contact your insurance agent (I am not an insurance agent and this is not an advertisement for insurance services or products). For questions about water management around your house, contact me anytime – Tim Howell, Milepost Home Inspection, 832-986-1942, inspector@mileposthome.com. Texas Professional Inspector License #24309.

Smoke and Carbon monoxide alarms

Have you tested your smoke alarms recently? Do you know where they are, how old they are, and if they are functioning?

Smoke and carbon monoxide (CO) alarms are important safety features in your home. Current standards recommend that smoke and carbon monoxide alarms be tested monthly and batteries be replaced every 6 months. Smoke alarms should be replaced every 10 years, and carbon monoxide alarms should be replaced every 7 years. Combination smoke and CO alarm devices are widely available.

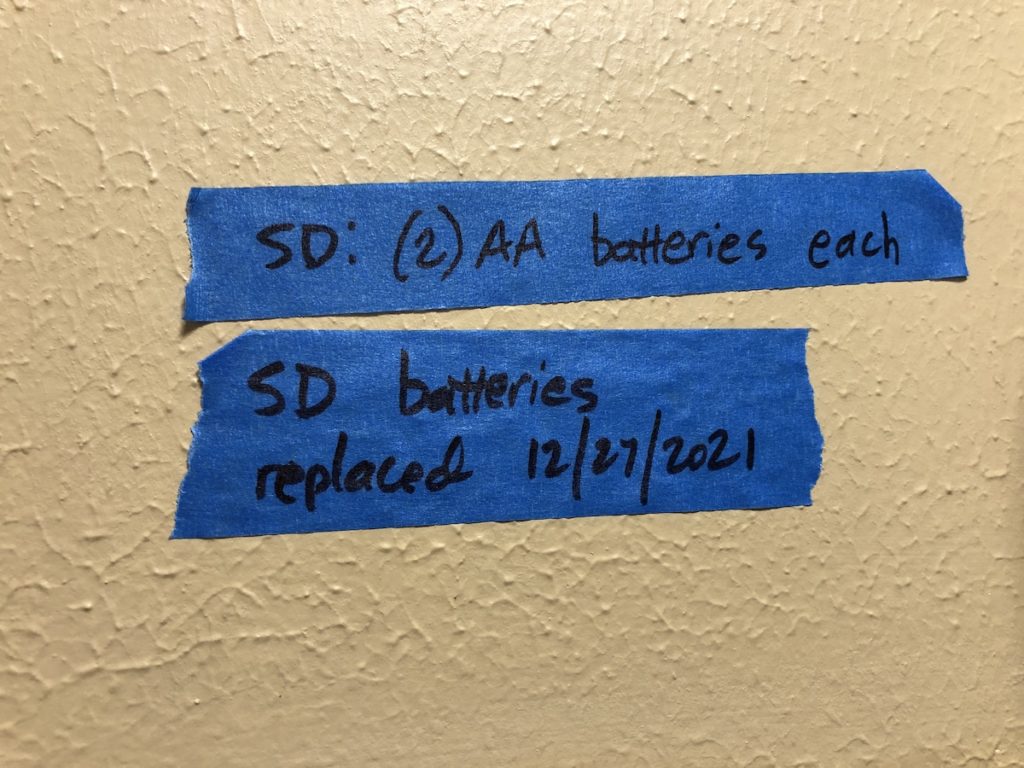
Here’s a suggestion to help you remember: set a reminder using a phone or calendar app that will notify you when it’s time to test the alarms or change the batteries. You can also use a low-tech solution, such as writing a note on a piece of tape that you place in a closet. What will work for you?

Current standards recommend smoke alarms be located in each sleeping room, outside each separate sleeping area in the immediate vicinity of the sleeping rooms, and on every level of the home. Carbon monoxide alarms should be installed in a central location outside each sleeping area and on every level of the home. If the home has an attached garage, a CO alarm should be installed inside the home, near the door to the garage. For best protection, interconnect all smoke and CO alarms throughout the house – when one sounds, they all sound.

See images below for more details. Additional information may be available from your local fire department, and at nfpa.org/Public-Education. Protect yourselves and your families by making sure your smoke and carbon monoxide alarms are properly installed and functional.

Return air filters

Do you know where your return air filter is? Have you replaced it recently?

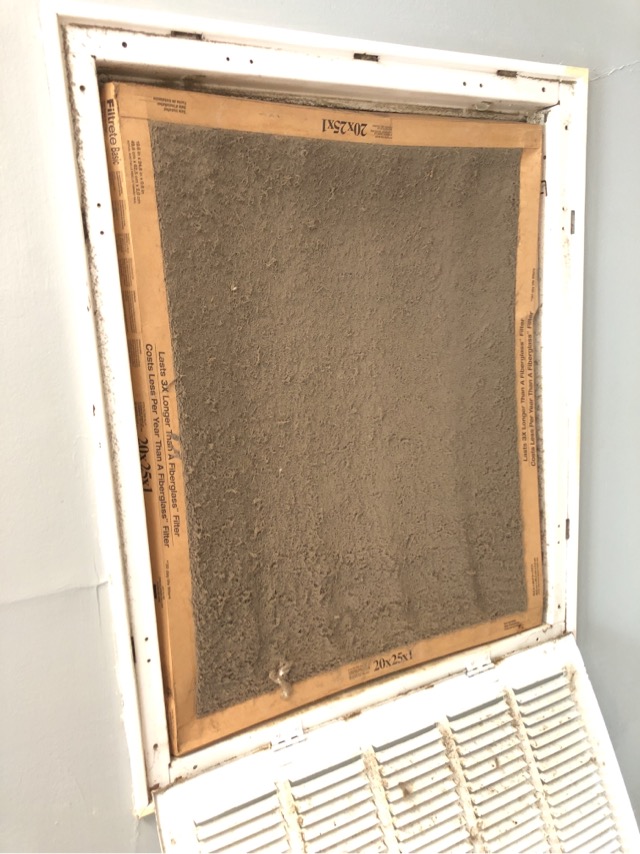
Return air filters are part of your home’s heating and cooling system. They trap dust, dirt, hair, pet fur, and microscopic particles. Without a return air filter, those contaminants would get into your heating and cooling equipment and be recirculated throughout your home. Return air filters enhance your indoor air quality and extend the useful life of your equipment. When filters are dirty, they don’t screen out airborne particles and they force your equipment to work harder; this causes a loss in performance, more money spent on energy costs, and more contaminants in the air you breathe.

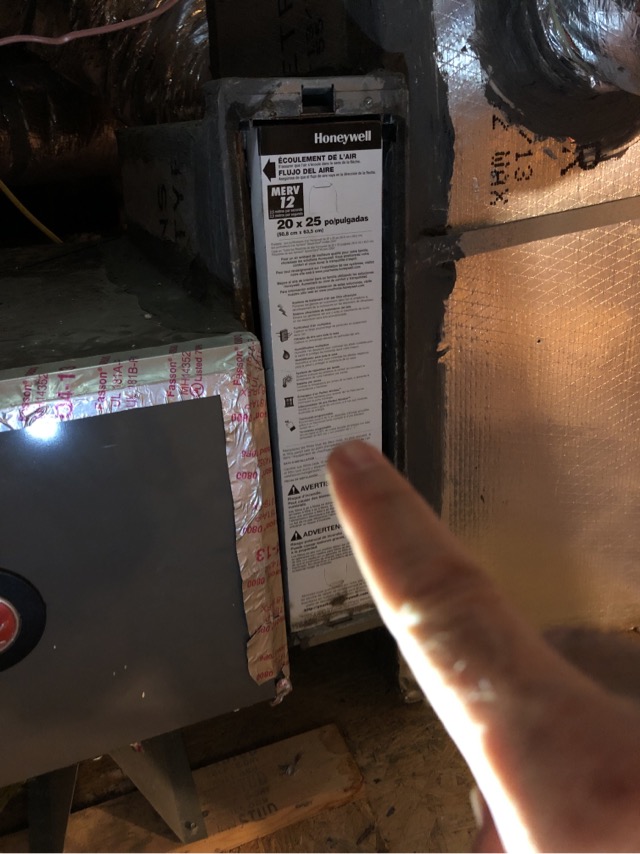
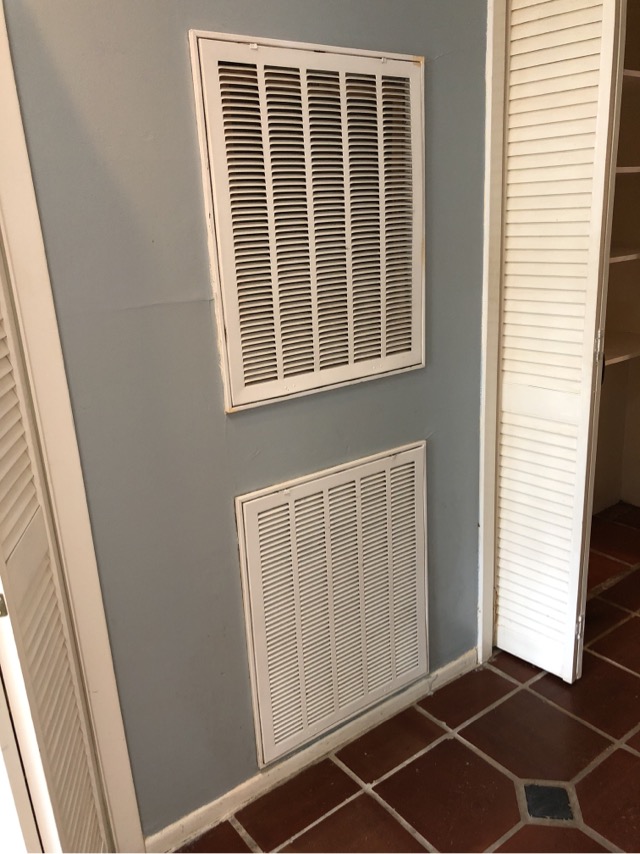
Your home may have one, two, or more return air filters. Often, there is a single filter located adjacent to the furnace in the attic. It is also common for filters to be located at return air registers, which may be located in walls or ceilings of your home.

Filter adjacent to furnace in attic
Return air grills in wall

Replacement of return air filters is usually fairly easy. Determine the exact size required (generally by looking at the existing filter). Make sure you check the “actual size” – for example, filters that are listed as 4″ thick can be anywhere from 3-1/2″ to 4-1/2″ thick. Before removing the old filter, look for an arrow printed on it indicating airflow direction. Install the new filter with the airflow arrow pointing in the same direction.

Extremely dirty air filter

Return air filters are available in many different types and price points. They may have a “MERV” or “MPR” designation; filters sold at Home Depot have an “FPR” designation. These all mean slightly different things, but in general, a higher number means the filter screens out more particles. I recommend buying filters with the highest MERV, MPR, or FPR that you can afford.

Return air filters should be replaced regularly. In my home, I have a main heating/cooling system with two 20x25x4 filters; I replace those every two months. I have a secondary small system with one 16x20x1 filter; I replace that every month. Your needs may vary, depending on number of people living in your home, pets, and other factors. I use the Reminder app on my iPad to let me know when it is time to change filters.

In terms of cost/effort versus benefit, replacement of return air filters is one of the best home maintenance tasks you can perform. It’s usually easy and fairly inexpensive, but will provide significant benefits in air quality, energy cost expenditure, and equipment life. If you have any questions about return air filters, feel free to contact Milepost Home Inspection, another licensed home inspector, or a licensed Heating Ventilation Air Conditioning specialist.

Are Your gutters causing foundation problems?

One of the most common concerns for home buyers and homeowners is the condition of the home’s foundation. With good reason – the foundation literally supports every part of the house.

But the foundation is in the ground.  How can it be affected by gutters that are ten or twenty feet above? Read on to find out ..

Much of the soil in the Houston area is “expansive,” meaning that it swells considerably when water is added and shrinks just as much when it dries out. This swelling and shrinking can cause the foundation, and the rest of the house, to move. If this movement is consistent at all parts of the house, there may not be a problem – the house can float up and down, like a boat on a lake. However, it’s more common for a house to experience what’s called “differential settlement,” meaning one or more areas settle or move at a different rate than others. This difference can cause walls to crack, doors and windows to bind in their frames, and the foundation to lose integrity.

Rainfall is generally consistent on all sides of a house, so soil expansion and contraction from rain should also be consistent. When a lot of water collects in one or two locations near the house, soil expansion and contraction may not be as consistent, and there is a much greater chance for differential settlement and damage to the house.

What does this have to do with gutters? Gutters collect water from the roof and direct it to downspouts which discharge the water onto the soil or into underground drainage systems. As long as the gutters and downspouts are performing their jobs, the possibility of differential movement is minimized.

If a gutter fills up with leaves, pine needles, or other debris, water can be blocked from draining. It may spill over the edge of the gutter, pooling up near the house. Other factors to consider are downspouts that discharge too close to the house, and soil that is not sloped away from the house.


We get a lot of rain in Houston. Keep your gutters clean, make sure your downspouts discharge at least 5-6’ from the house, and adjust your landscaping so water doesn’t collect against the foundation.

If you have any questions about foundations, gutters, drainage, or anything else about your house, please feel free to CONTACT Milepost Home Inspection at 823-986-1942 or inspector@mileposthome.com.  We look forward to hearing from you!

Painted brick – yay or nay?

White painted brick. If it’s not in your neighborhood yet, it will be soon. An recent article in the Houston Chronicle states “Painted white brick exterior with black trim is a popular trend in Houston” and goes on to say “The look has become so popular that people are even using it on new homes.”

I live in a neighborhood of 50-year old homes. These homes were originally constructed with traditional brick colors: shades of brown and tan. Many have recently been painted white. These homes visually stand out against the “earth tones” around them – but will that paint be a good choice in the long run? Time will tell.

Brick has been a popular choice on homes and buildings for hundreds of years. Why? Because it’s durable. Brick is a natural material made from clay that provides strong protection for your home with minimal maintenance.

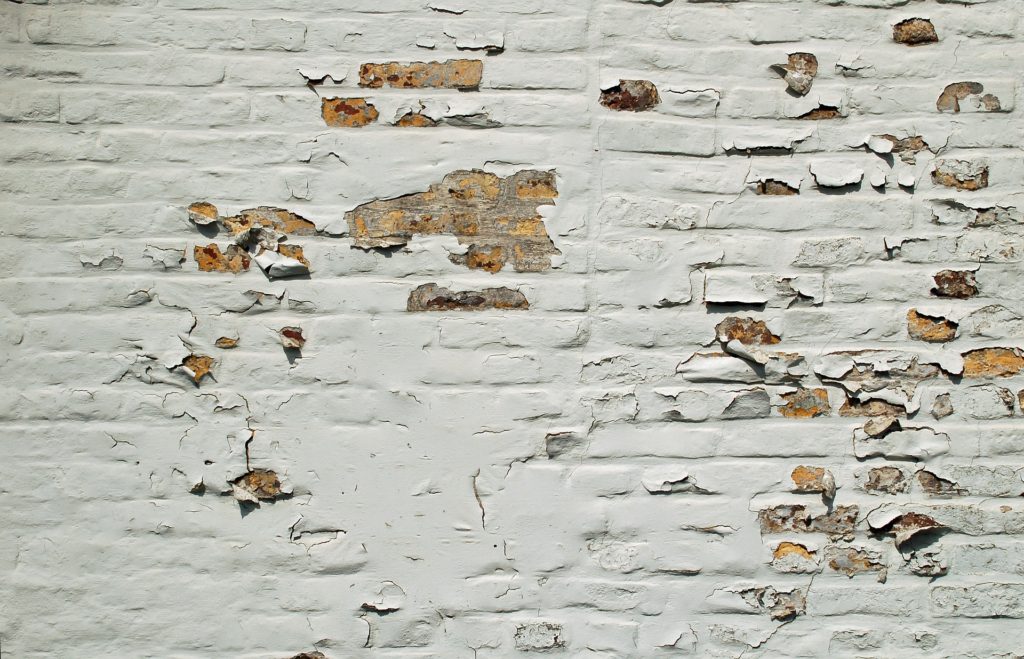
Are there any concerns with painted brick? Yes, there are, as described in this article by Houselogic. Sooner or later, depending on the quality of the preparation and application, paint will peel. Paint also interferes with brick’s ability to breathe, trapping moisture inside the wall construction. Trapped moisture leads to damage of the structure and insulation, and it can attract destructive insects like termites. Painting new brick could be particularly troublesome if the brick has not had to time to fully weather and dry out.

Peeling paint on brick wall (image from Pixabay)

Acme Brick, a premier brick manufacturer located in Texas, recommends “against painting new, porous brick.” The Acme article also suggests cleaning, varnish, or whitewashing brick as other options to consider, and it describes a recommended process for the cleaning, preparing, and applying paint to brick. This is not a project for the average homeowner; because of the careful preparation required and the heights of most houses, a qualified contractor should be hired. As with any project, get references from friends, family and neighbors; ask for bids from at least three contractors and make sure they are covering the same scope of work; request to see the contractors’ insurance coverage; and carefully read any contract before you sign it.

All home improvement projects have a variety of issues that should be considered carefully: aesthetic, practical, and financial. Painting brick may give a homeowner the satisfaction and pride in a beautiful-looking home, and may also provide an increase in property value. Will those remain if, in a few years, the paint is peeling and there is moisture damage inside the walls?

Milepost Home Inspection will be happy to talk with you about the pros and cons of any home improvement project. Contact us at 832-986-1942 or inspector@mileposthome.com with your questions.

Where is Your Water Heater?

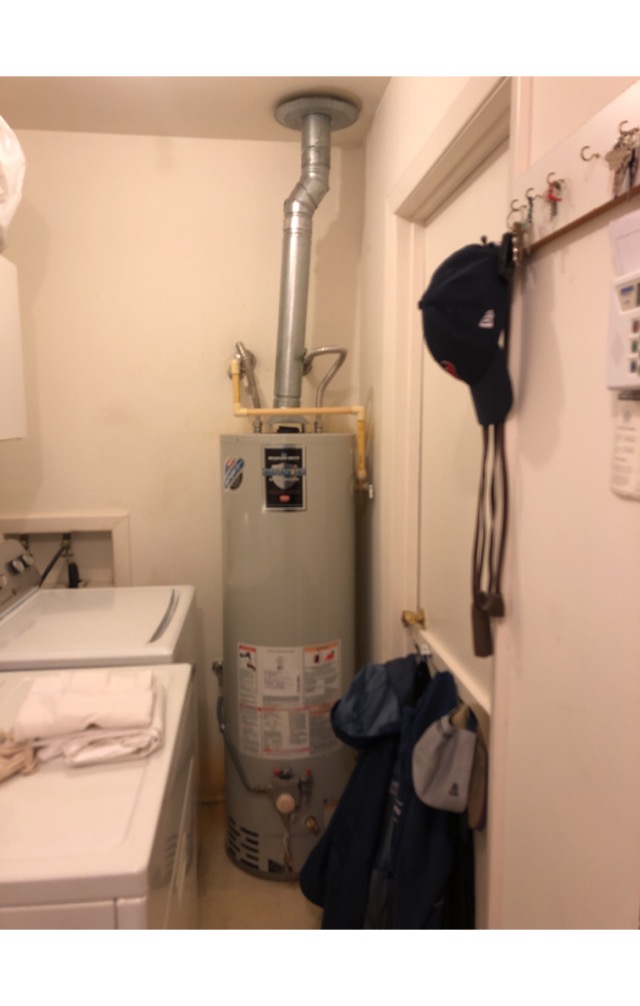
Where is your water heater located? Is it in the laundry room like the one shown here? Or in a closet? These locations are typical for older homes, but they do bring up some concerns.

When a water heater quits, a homeowner will generally ask a plumber to provide a new one in exactly the same location. That makes sense in many ways, since the plumbing lines, venting, and building structure are already set up there. Here are a few things to keep in mind when replacing an old water heater:

  1. Physical space. Every water heater manufacturer requires a certain amount of space for the unit to fit into. This information is often listed on the manufacturer’s label affixed to the water heater. A water heater that is placed in a space that’s too small may not heat water efficiently, or may be at risk of overheating the surrounding wall or ceiling materials.
  2. Combustion air. Gas water heaters need air to burn natural gas efficiently. Many older homes have a water heater located in a laundry room or closet. Newer water heaters may require a different amount of combustion air and may not burn efficiently in the same space. This can result in exhaust gases collecting inside the home instead of being vented to the exterior.
  3. Venting. Similar to combustion air, newer gas water heaters have different venting requirements than old units. Old venting systems that are not compatible with new water heaters can also be a cause of exhaust gases inside the home.
  4. Connections. Although there may be plumbing, gas, and/or electrical connections in place at the water heater location, they may not be compatible with the new unit. These connections should be evaluated to determine if they are adequate and safe.
  5. TPR valve. The temperature and pressure relief (TPR) valve is a safety feature on water heaters. It is designed to release water if the temperature or pressure exceed certain levels. Older water heaters may not have a TPR valve, or it may be inoperable, or the drain line may be improperly routed.
  6. Drip pan. Does the old unit have a drip pan underneath to collect leaks? If not, consider adding one. While not required in all instances, a drip pan is very inexpensive way to add a little more protection.

These are just a few things to think about when your water heater needs replacement. If you have any questions, consider consulting a licensed home inspector or a licensed plumbing contractor about your situation. Please Contact Us to see how Milepost Home Inspection can help.

Most of all, always do what’s necessary to keep yourself and your family safe!

Scroll to Top